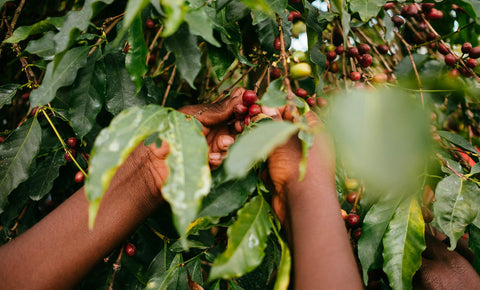
Milk and coffee, a fated pairing.
The most common coffee beverages - the icons like lattes, flat whites, and such - can comprise an average of 60% - 80% milk in the cup, meaning that these beverages rely on good milk as much as they do on great coffee. Whether you’re team dairy or team plant-based alternatives, we live in a day and age where the variety is abundant and delicious.
“Coffee beverages rely on good milk as much as they do on great coffee.”
Despite being such a large part of the drinks we love, the techniques needed to take this ingredient to the finished beverage can be daunting to grasp or master. Ever felt like you're just not getting the hang of milk steaming? Confused with industry jargon like microfoam, whirlpool, or aeration?
If you're nodding your head to that, then we wrote this with you in mind, and our goal is to decipher everything you need to know so that you can start enjoying a cafe-style flat white at home.

Using the right milk.
Let’s begin with the conventional dairy option. The ideal dairy for that perfect coffee needs to meet one first and foremost requirement: fresh full-fat milk.
We don’t advise low-fat as it doesn’t foam well and lacks tactile interest. Furthermore, UHT (Ultra-High Temperature processing) is a process that takes away a lot of the milk’s best flavours. Meanwhile, raw milk could embark you on a rollercoaster of health complications - but under food safety regulations, in Singapore at least, it’s unlikely you’ll come across it while doing your groceries.
The most important influences on how a milk brand will taste come down to the source — the breed of cows, their diet, lifestyle, pasteurisation, etc.
We’re always receptive to new milk brands or imports in the market, but our ‘day one’ go-to for our Singapore cafes is Meiji. It’s creamy, flavourful, and we find it brings out the best in our coffee. In Malaysia, we use the Master Barista series from Yarra Farm.
The names we dropped are safe bets, but we also believe in you going out there and trying new things.
Alternative milk (known as mylk on the streets)

Historically, alternative milk has been that one or two cartons tucked away in the bar fridge reserved for the occasional dietary-specific coffee order. But, now, alternative milk is another everyday topic and is shaping to be the norm for consumption - highly competitive to dairy.
Dare we say, we think it can taste better than dairy. Not all the time, but often enough.
Our favourites are oat and soy, Oatly, Oatside and Bonsoy are our go-to's (Pacific soy in Malaysia). Not only do these require fewer resources to produce compared to rice or nut variants, but we find they taste simply the best, better than all the rest.
Generally, look for the ‘barista edition’ or ‘made for coffee’ versions. These are designed to create well-structured, smoother foam and pour latte art.
“[For alternative milk] Generally, look for the ‘barista edition’ or ‘made for coffee’ versions.”
Any OG soy drinkers will recall the dreadful, violent curdling of mixing coffee and soy. Luckily, we’re past that, and the future looks bright. Who knows, maybe less than a decade from now, drinking dairy would be considered ‘alternative’?
Let's get started
Practice makes better, maybe never “perfect”, and that’s fine. So when you’re ready to froth some milk - follow along.
Step 1: How much milk to use?
Pour the milk into a pitcher designated for milk steaming. The volume will almost double in size, so it’s ideal not to use too much milk - we recommend about half (or 40% full) of the pitcher.
Tip: The colder your starting temperature is, the more time you can steam and texture the milk.
Step 2: Purging & Wiping
An unused and cool steam wand (even if left for a few minutes) forms condensation in the wand, so purging is required to release this condensation. After the steaming process, it is also crucial to clear out any milk that could have gone inside the steam wand.
Wiping is another important cleanliness factor that compliments purging to prevent milk build-up on the steam wand or tip. If left uncleaned, the protein in the milk can calcify (geeky way to say harden) and inhibit steam from passing smoothly.
Step 3: Starting position
Find a comfortable way to hold the pitcher's handle and bring it up.
Tilt the pitcher, so the milk jug faces towards you. Angle or tilt your pitcher to the left, bring the pitcher up, ensuring that you immerse the steam tip in the milk.
Step 4: Understanding Microfoam
"The term "microfoam" describes a quality of frothed milk in which the countless bubbles are so tiny that you can’t see them, but they can be felt - on the palate."
During the stretching process, the steam tip should be on top of the surface of the milk. A screeching noise indicates that the steam wand is too submerged, and a gurgling noise suggests that the steam pressure is too low (The milk flow should be swirling, in these steps, you only have to move your pitcher higher or lower).
Step 5: Texturing
By introducing a whirlpool effect inside the pitcher, you are breaking down big bubbles and create denser, smoother foam.
Texturing is also important to mix the foam and milk - if done poorly, the foam will separate from the milk and stay on top of the steamed milk.
Keep your other hand on the side of the pitcher to gauge temperature. When it’s too hot to touch, count two more seconds and turn off the steam wands (this should be around 60°c, perfect drinking temperature)
Step 6: Swirl and a pat on the back
Swirl your freshly steamed milk to prevent foam separation, and don’t forget to give yourself a pat on the back for doing such a fantastic job at following through so far.
Step 7: Breaking down Latte Art Steps
Latte art is the skill of pouring so that the fluid microfoam milk falls below the crema, whilst light, white foam sits on top, creating our art.
Apart from going high to low, we don’t need to move the pitcher to create a centred, symmetrical blob. When the cup is about full, lift the pitcher and slowly move forward to cut through the blob shape to make a heart.
The cut is by pouring the milk with an ascending motion, as you’ll be going from a low pour back to a high pour. Some also describe this as a ‘slash’ or ‘flick’. It pulls the entire design out lengthways, creating a tapered tip to finish the pour.
Final words
To wrap this one up, preparing incredible milk - and coffee to add to that - results from many small steps done right. So practice away and welcome the failed attempts, because trust us, we too have gone through many.
It’s about what’s inside that counts. So go easy on yourself if you’re new to latte art; it’s early days.
Feel free to come back here whenever you need some help, or share it with a friend if you’re trying to subtly tell them they need to up their coffee game for when you come around.
Shameless plug here - we have dedicated Barista Academies in Singapore and Malaysia that have been training cafe operators, baristas, hobbyists, and general enthusiasts for many years now. So if you’re keen to delve further, invest in new skills and knowledge, and get your hands dirty, please check out our classes!
Thank you, everyone. We want to know if our instructional writing skills are as good as our coffee-making skills, so please let us know! Show us your attempt at milk steaming on Instagram and tag us with “#cmcracademytips” and we may even get our trainers to offer pointers. If you enjoy reading and want more coffee-related news, sign up for our newsletter or follow us on IG @commonmancoffee.
Go froth and good luck.💪
Written by Carmen C. & Pablo B.
From Team CMCR